I spent a few evenings turning the idea over in my head figuring out (1) what pieces I'd need and (2) what order they should be sewn together. A little fun shopping for upholstery fabric and other cool things like straps and piping and I was ready to begin. It came together really smoothly and turned out almost exactly like the picture in my head. Yeah! She loves it and is now toting it around campus.
Here is the finished bag, in a couple of different views.
This is the front:
The fabric is a neat corduroy-type tan with a fun circle pattern. The straps are purchased webbing.
The back:
And a close-up of the cool piping.
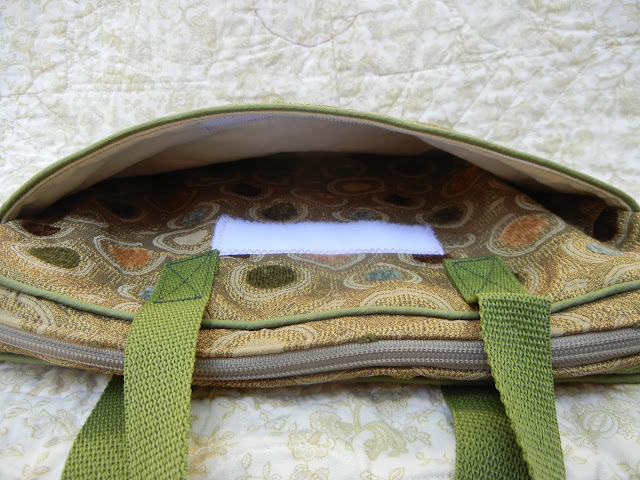
The front has a slot pocket the width of the bag with a wide piece of velcro for a closure.
I had wanted to do a flap to close the pocket but all the layers of canvas and upholstery fabric and piping got to be a bit too thick so it ended up being a slot pocket.
It closes with a zipper that goes around the corners of the bag for easy opening.
The inside is a nice soft fleece fabric to protect the computer. I quilted the fleece to canvas to keep things nice and sturdy and give the bag some stiffness.
The trickiest part of the bag was deciding how to attach the outside to the lining. There are many layers between canvas, fleece, piping, upholstery fabric and the zipper so I ended up putting bias binding around the edges of the lining and then hand tacking that to the outer portion of the bag. It worked great. Both the inside and the outside are properly finished (no exposed seams) and everything stayed nice and tidy (even around the zipper ends).
Here are a few pictures with our MacBook Air (11''?) for size reference. My friends tablet is a bit smaller than the MacBook so there will be plenty of room for a book or two or an accessory keyboard if she needs to carry one of those.
It was fun to make and very satisfying to make from scratch. Sometimes when you sketch an idea and try to sew it things get crazy and don't turn out, so it was great to be able to visualize it and then sew it up and have it turn out so well.


No comments:
Post a Comment