Welcome to Anne's sewing blog!

I started this blog in 2012 in an attempt to keep better track of all the little things I make. I have found it fun to 'catalog' what I make so I'll continue to post my finished projects as they appear.

Its mostly for my personal use, but also gives me a way to share cute stuff with my craft-oriented friends and family. Enjoy!

Thursday, August 29, 2013

New Pillows for the Couch

Whew - after a hiatus in July for travel and illness there has been lots of sewing going on the last few weeks.  Time to catch up and post the finished projects.

First up is a few pillows.  We have some throw pillows on our couch that have been thrown a few too many times and are all floppy and lumpy.  I've been meaning to replace them for a while now and new pillows seemed like a great project a few weeks ago when I was recovering from a nasty stomach bug and needed a quick, easy, instant-gratification type of project.

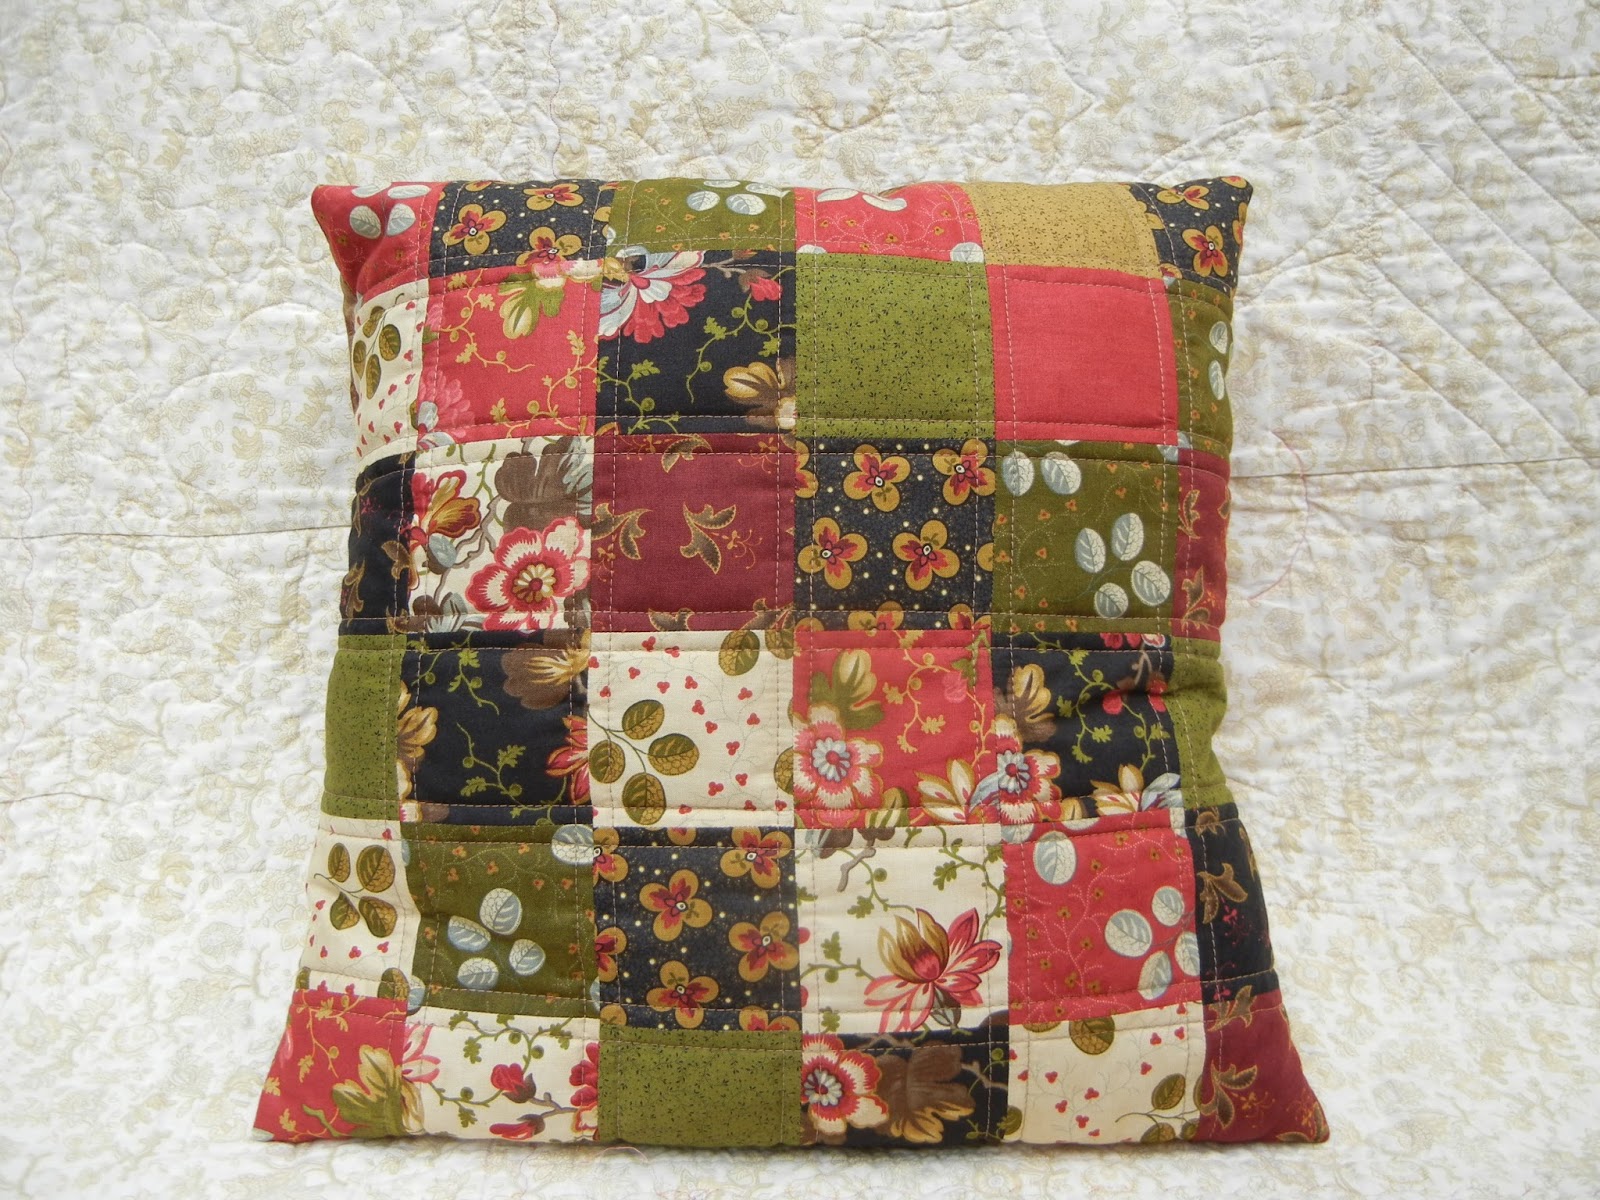
I made two 18'' quilt blocks from a coordinating set of fabrics I picked up over a year ago (with these pillows in mind, no less, because they match our living room color scheme).


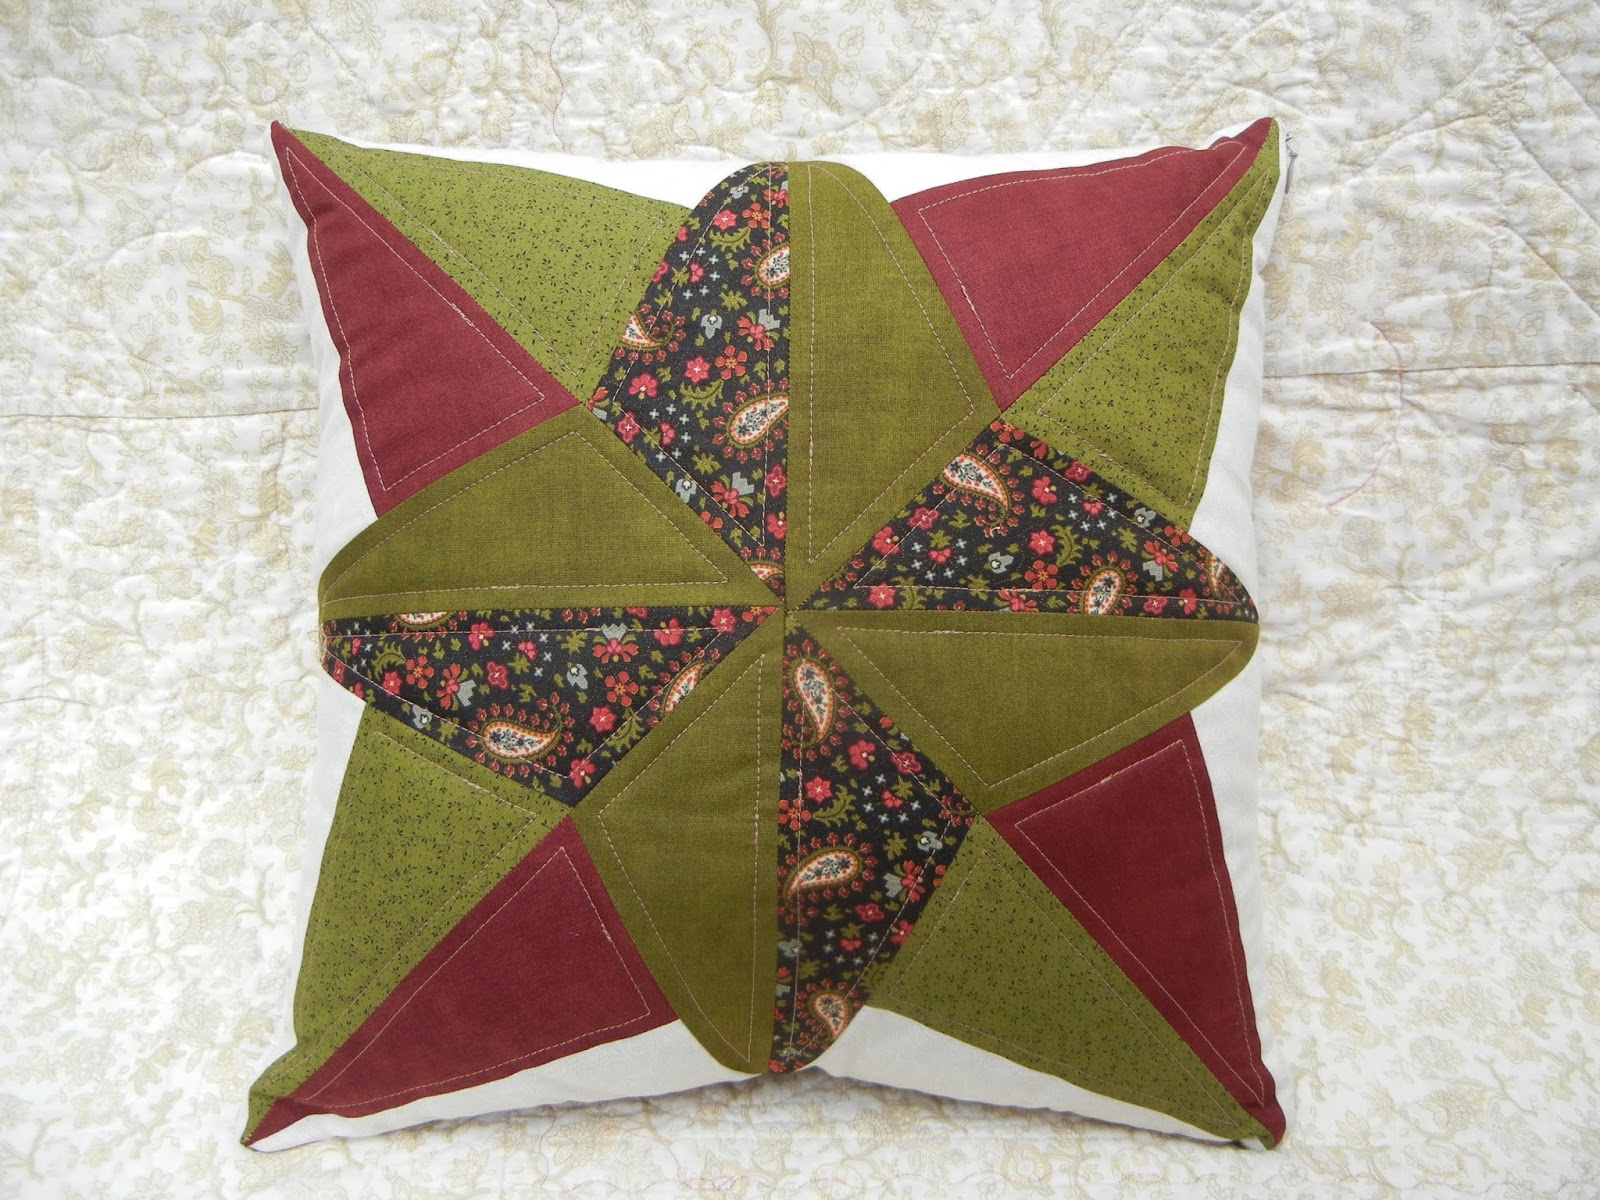
One is a star pattern.  I've been wanting to try this star block for a few years.  It came together nicely, but I won't be doing a whole quilt of these blocks.  One star block has 24 pieces, half of them are the reverse of the other half, and they are all odd shaped triangles.  Translation: very easy to get the pieces confused.  I had a hard enough time keeping things straight for one block - I can't imagine doing a whole quilt made of this block.  Also, since the pillow form is puffy and rounded, when you look at the pillow from afar you can't really see any of the oh-so-carefully matched star points on the edges.  If I do it again, I'll make the star smaller and put a border around it so that you can see all the star points at first glance and the border will be the part that gets 'rounded off' on the curvy pillow.  Who knows, maybe it'll get better as the pillow gets used and flattened out?  I quilted it by machine and outlined the interior of each triangle shape.  It involved lots of corner-turning but I wanted to accentuate the triangle/star pattern rather than run over all the seams and have a mish-mosh of seams in each corner.


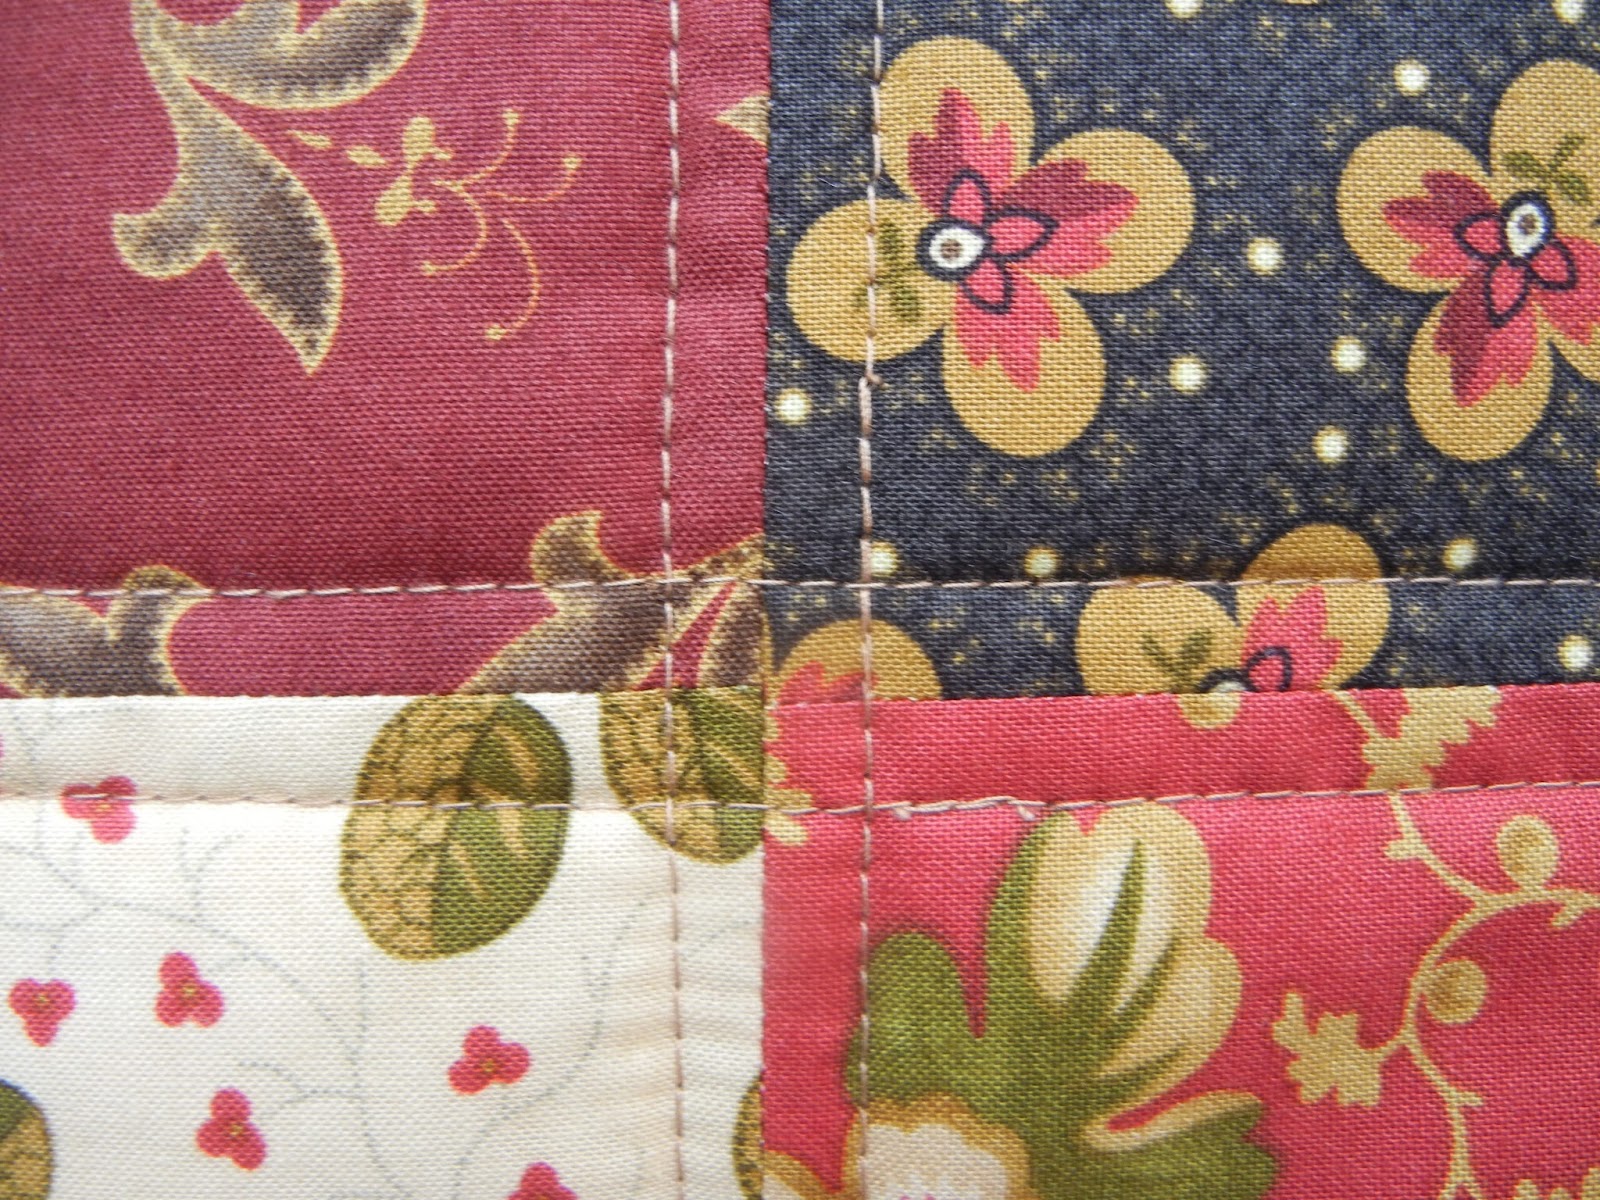
The other pillow is a simpler pattern - just a series of squares - and I really like how it turned out.  I am too anal/organized/OCD to do a random scrappy look so I had to at least put them in diagonal rows by color.  For me its a good mix of organized and scrappy.  I quilted this one a bit inside each seam and I like how the stitching ties it all together.


Here are the new pillows 'in situ':  


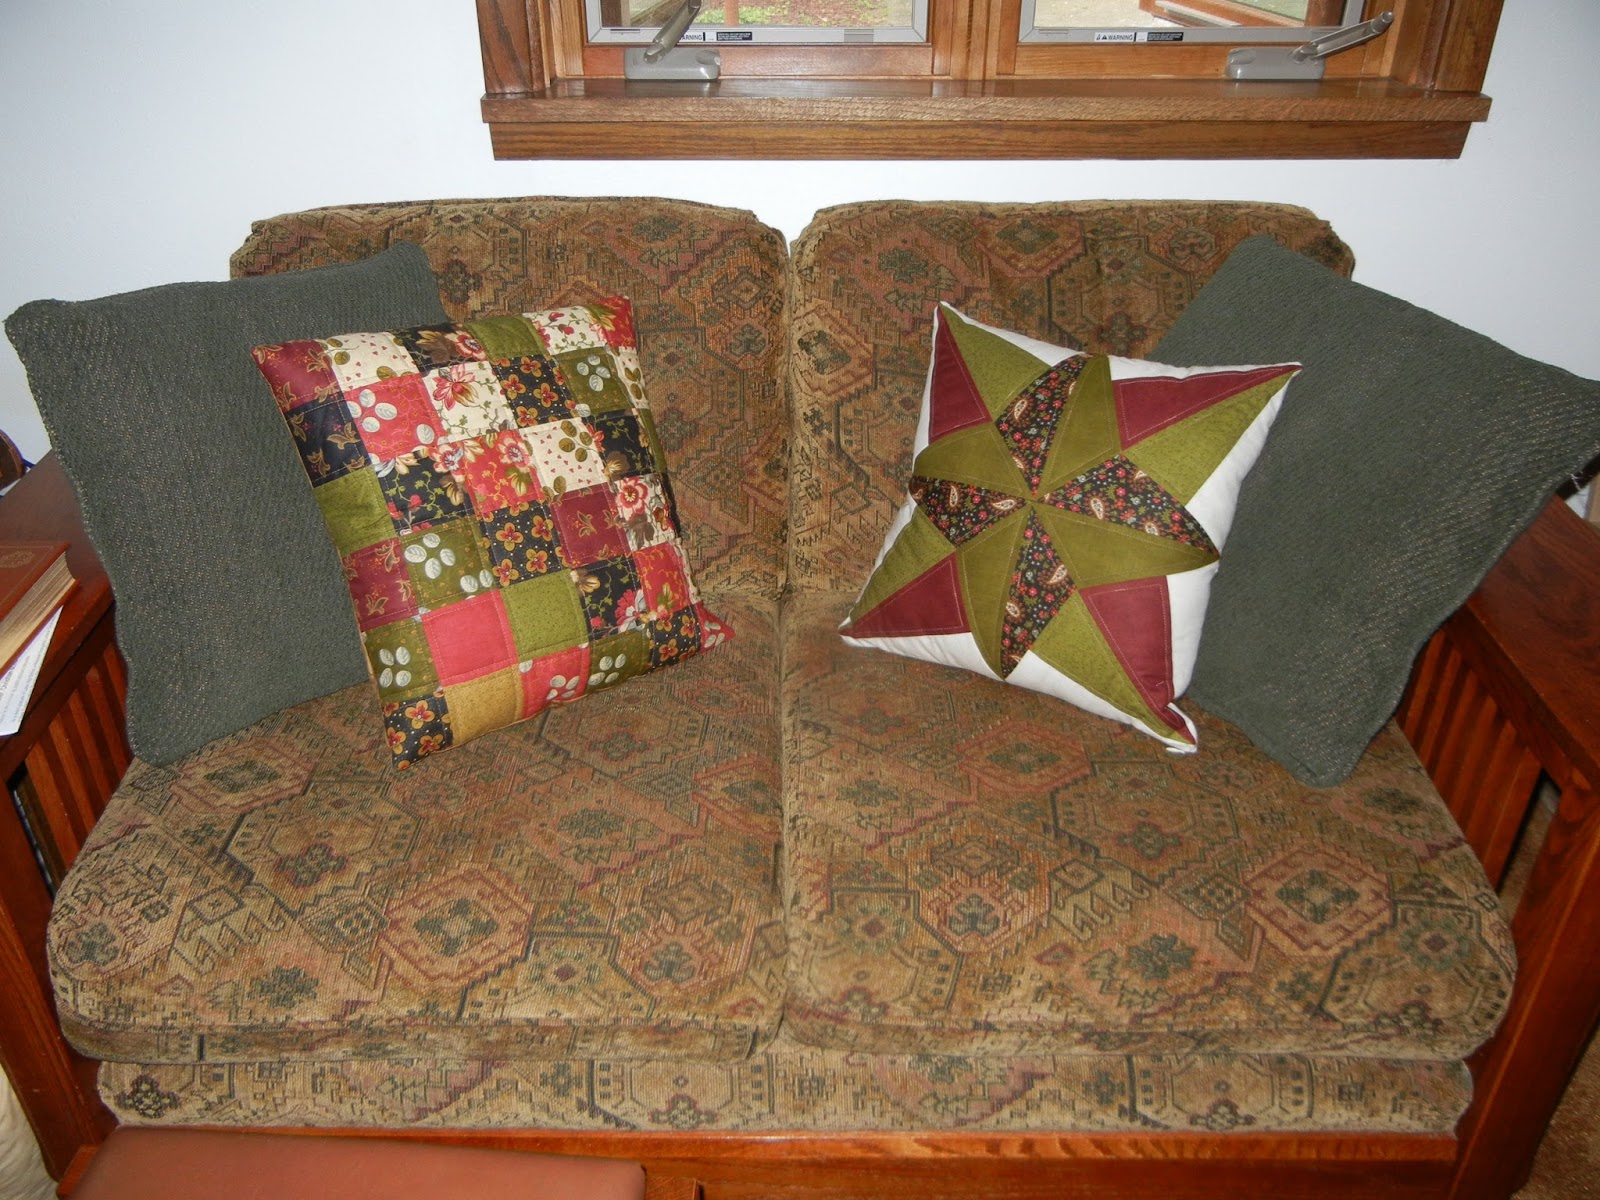
They were a fun, quick project and now I can cross 'new couch pillows' off the 2013 To Sew List!  


Monday, August 5, 2013

Moms Swimdress for 2013

I get a new swimdress this year too.  I am very happy with how last year's suit has worked out.  Great coverage and decent fit.  This one is purely an excuse to mess around with pattern drafting and make myself something new.  I wanted to try the color-blocking (that's the pink line under the bust), wanted to try a different shaped neckline, and wanted to practice the double-needle topstitching around the neckline.  I've already worn it to the pool once and its great.  I'm not completely sold on the solid black material - maybe a small print would be better.  My inspiration came from some suits I pinned here.

I discovered its very difficult to get a decent picture of shiny black material.  These are the best I could do for now.  You'll have to excuse the wrinkly skirt - its been in a drawer for a while as I made it over a month ago and am just now getting around to taking photos of it.


Kids Modest Swimwear for 2013

I've continued to make swimsuits for my girls.  Now that I've got my own working pattern(s) and have a little practice sewing on super-stretchy lycra they are pretty quick to work up.

Leah requested a bodysuit style this year - so she could look like Rebecca Soni and all the other Olympic swimmers.  Cute, huh?   I took her sloper and drafted a shirt.  I used a rub-off technique found in this book to copy the armholes and sleeves from a leotard we have that happens to fit well.  It worked pretty well - I found the rub-off fast and easy to do and the resulting armhole and sleeve on the suit work great.  The lycra is pretty forgiving so I don't know how it may or may not transfer to a regular set-in sleeve but its good for this application.  The leggings pattern I had already and is one of my standbys.  Its good for swimsuit shorts and I've used it for full length leggings/tights for school as well.

Here is Leah's Olympic bodysuit.  Convincing her to stop dancing long enough to take the photo was an issue so it looks a bit twisted and uneven - its really not.  :) (Also, the matching of her suit and her crocs was a happy accident.)


I ended up needing to add a band to the bottom of her shirt.  
It was too short otherwise.  If I make another one I'll make the shirt longer.  


"Can I make a diving pose Mom?"


Grace's suit this year was a piece of cake because I could use the exact same pattern I made for Leah two years ago.  That is a handy bonus now that I've been making suits for three years - I can start reusing things. Her suit is the swimdress pattern I made up, with lengthened sleeves.  


"Mommy can I do a pose too?"  


I was pleased with how this neckline turned out.  
Better yet, I wrote down how I did it so I can repeat the process later.  


The sleeve hem and bottom of the dress hem are simple turn-under-and-multi-step-zig-zag.


Here are the little shorts that go underneath.  They are completely separate from the dress.  


Swimming lessons, here we come!