Welcome to Anne's sewing blog!

I started this blog in 2012 in an attempt to keep better track of all the little things I make. I have found it fun to 'catalog' what I make so I'll continue to post my finished projects as they appear.

Its mostly for my personal use, but also gives me a way to share cute stuff with my craft-oriented friends and family. Enjoy!

Wednesday, November 11, 2015

Batgirl Doll joins the house

We have a family of homemade/kid-made dolls at our house and the family added a member a few weeks ago.

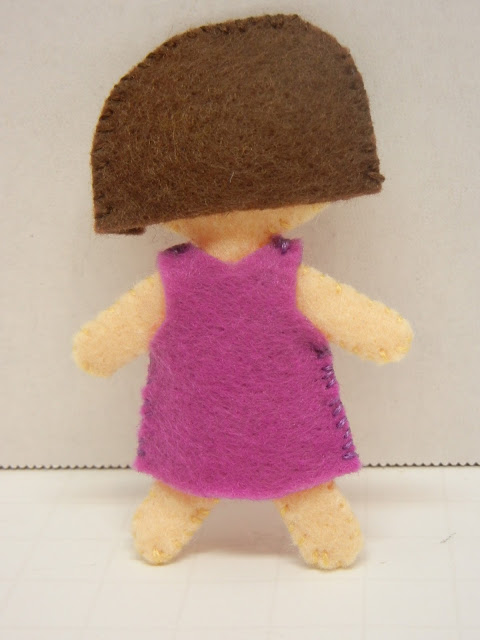
This is Batgirl doll.


As you can imagine from our Batgirl Halloween costume, someone in our house is really into Batman/Batgirl/DC Comic superheroes right now.  Grace designed this doll, meaning she told me what features she wanted our basic doll pattern to have:  black clothes, bat symbol, mask, and red hair.  She did all of the drawing and fabric cutting on this project, had the foresight to make the back of the head from red felt 'so that it would look like more real hair under there', and supervised all my sewing from about two inches away from the needle.  


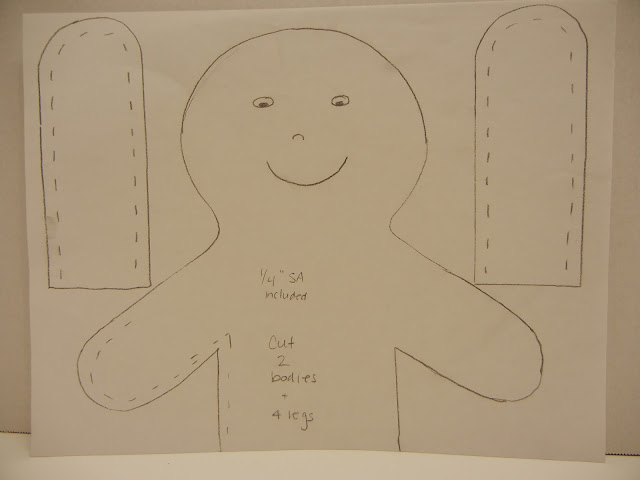
I'm not sure where I got this pattern from - its just drawn on white paper so its possible I drew it.
I can't really remember.    


We've used it for kid-gifts along the way and we add to our family whenever the Imaginary Play of the Month needs a doll.   Sometimes I make them, sometimes the kids do, they only take an hour or two from start to finish so they're great for a rainy Saturday project.  Sometimes we sew with cotton, turn, and stuff.  Other times (like Batgirl) we use felt and just stitch it together around the outside (skipping the turn-right-side-out step before stuffing).  Either way works.  

Other members of the family include:

Rapunzel...


... Elsa...


... the two original members of the family who are named
Nettie and Jewel-ee ( not to be confused with the more common 'Julie')...


... and their two princes.

I know... sooooo handsome, right?  :)


Here's the whole family so far.  Pretty eclectic, but what family isn't?!


I post this not because the design or sewing is stellar but because in a few years when the girls are into clothes and hair and makeup and boys (ack!), I can look back and remember when we used to whip up doll family members to fit their imaginary play.  Leah and Grace don't see funny shaped, somewhat lumpy dolls with odd hair and marker drawn clothes - they see dolls they made with Mom so they could be creative and play pretend. 


If I was placing bets, the next additions to the family might go by the names of Luke, Leia, Han and Chewy.  That could get interesting...

Thursday, November 5, 2015

Knit Dress for Mom

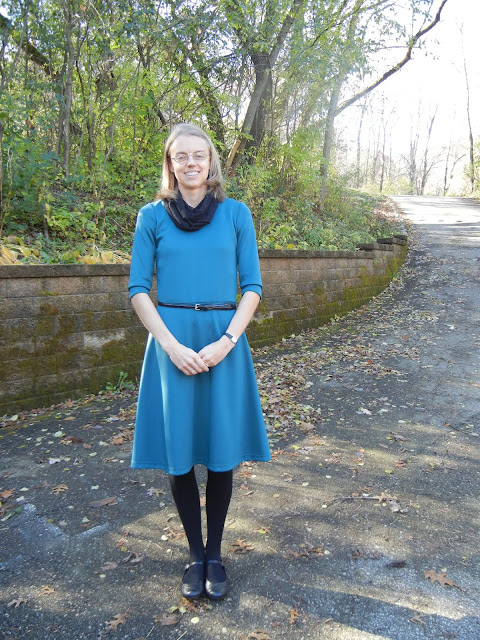
I made myself another new dress last month and just got around to taking some pictures the other day.


One of my goals for the year was to make myself some properly-fitting modest church dresses and this is the second one.  (It helped that we had two family weddings this year - nothing like deadlines to make it happen, right?)  The two dresses ended up looking very similar in shape/silhouette, but the first dress was made with woven fabric and this one is a knit.  I love that I now have good blocks/patterns for myself for both types of fabric.  Drafting skills are handy, but starting from a well patterned block that I know will basically fit is awesome awesome awesome.  It is kind of like having a go-to recipe - you can change up an ingredient here or there but you know that the recipe is dependable and it just plain works.  I now have 'go-to recipes' for dresses for myself.

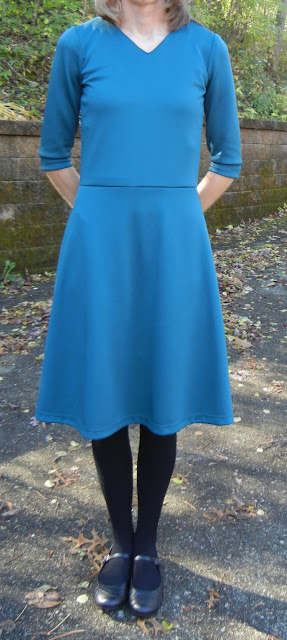
For this particular dress I started with my altered Sewaholic Renfrew shirt block from the summer.  I changed up the neckline, shortened it (to be a dress bodice rather than a long waisted shirt), made 3/4 sleeves (my current favorite), and drafted a simple A-line skirt.   The neckline is faced, the sleeves have a band cuff, and the skirt is hemmed with a twin needle.


It took a few tries to get the correct amount of ease but I purposely started big so that it was just a matter of taking it in a bit here and there.   I have a feeling every knit will need a different amount of ease anyway so I'm not too concerned about that adjustment.  The fabric came from my local Hancock and is a sturdy ponte knit.  Its silky smooth to wear and was pretty easy to cut and sew.  I've worn it three times now and have only found one little snag/run spot so I hope it lasts and wears well.  Its very comfortable to wear - I've heard people call knit dresses 'secret pajamas' and now I know why.  :)

When I was looking for the knit fabric this one jumped out at me as a pretty jewel tone color and I bought it specifically for this dress but without a specific plan for details/trims/embellishment/jazz.  I worked on the draft and sewing over the course of a week and when I finished I was quite happy with the overall look and fit, but thought it was a bit ..... blah.


Solid color, simple shaped dress, nothing really exciting.  I have been wearing it with a thin black belt and a black sparkly scarf and I think it works well that way.  I really need to get better at planning out entire looks before starting the sewing.  This dress could have used a different neckline/collar but I didn't decide that until it was done.  Anyhow, I do have a nice comfortable versatile new dress that was a relatively easy sew - no complaints there!

Monday, November 2, 2015

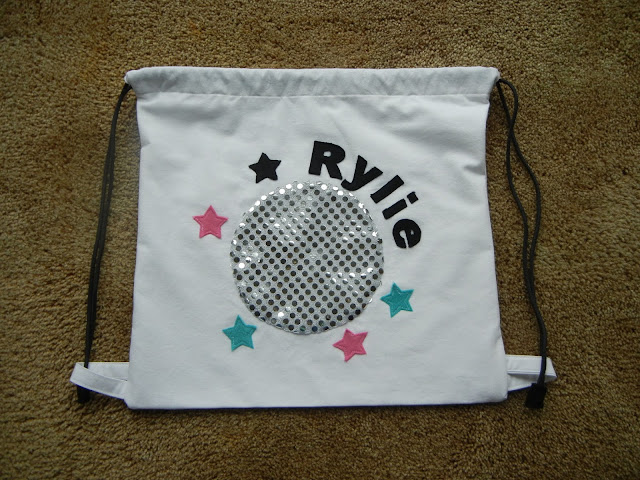
Drawstring Backpack

This is another birthday gift for an elementary school age friend...


I've made many drawstring backpacks.  They are so easy and yet so useful.

Leah designed this one for a friend.  Actually, her design was a little different but had to be amended due to atrocious sparkle dot fabric that was a major pain in the behind to sew.  In the end, the 'disco ball look' turned out okay.

Just by random chance we had two birthday parties in two weeks with two projects that were more stressful than they needed to be.  The first was stressful because a certain child kept changing her mind on what the project should be.  This one was stressful because I had a cool design idea from Leah that I just couldn't make work without pulling my hair out and breaking a crazy number of sewing machine needles.  So, I'm done with kiddy birthday gifts for a while.   I declared this a No Sewing Week (to cleanse the palette, so to speak) and we'll start fresh on some different projects in a little while.   :)

Sock Monkey wearing a back pack and carrying a mini felt doll

Yep, you read that right.

Sock Monkey.  Wearing a backpack.  That holds a miniature doll.

Because that's clearly the first thing that pops into your head when you need a birthday present for an elementary school age friend, right?


Well, if you're Grace it is.  Its a long story filled with strong opinions (Grace) and changed minds about those same strong opinions (Grace) and last minute designing (both of us) and sewing (mine).  But patience (mine!) prevailed and we got the gift done in time and the birthday girl was thrilled.  Which is what its all about, really - instilling in my girls that gifting homemade is special and different and worth the effort.  I've been lucky so far in that all our handmade birthday gifts for school friends have been amazingly well received such that my girls have no thoughts of trolling the plastic toy aisles of Target when birthday party invitations come around.  Their first question is always, "Oooh... what should we make her?!" and they start scribbling and sketching away ideas.

So, this is what a monkey and doll loving second grader received a week or two ago...


First, I was told-I-mean-asked to make a regular old sock monkey.  Grace's 'only' requirements were that she be made from a plain brown sock and that she be wearing a skirt.


I have made sock monkeys before and I use this tutorial.  Its easy in the sense that it only takes an hour or two to make a whole monkey, but its tricky in the sense that socks can be hard to sew on a machine due to their stretchiness so I usually do the sewing instead of the kids.


(I also learned that I like monkeys made from fun colored or striped socks rather than plain brown.  That tail just looks too much like a big terd for my liking...)


The skirt is stitched on to the monkey tummy - its not removable.

Then the sock monkey had to wear a backpack.  
(Its made of craft felt and ribbon.)


Then, the backpack must hold a doll. 
A tiny doll. 
That has to be small enough to fit in the birthday girl's hand or pocket.  
And it has to wear a dress with a flower on it.  


I drew, cut, and sewed this up by hand one evening following Grace's ''instructions''.  
 I set it by her breakfast spot for her to find in the morning.  
I knew it passed inspection when the first thing both girls said was "Awww... how cute!  Can you make me one?"  


There is a wee bit of stuffing in the head, otherwise its flat. 

Here is my hand for scale.  Yep - tiny.


Put it all together and what do you get?  

A sock monkey wearing a backpack and carrying a doll.  

Oh, to have the infinite imagination of a seven year old....


Sunday, October 25, 2015

Halloween 2015 - WyldStyle from the Lego Movie

Both my girls were Lego Friends for Halloween last year and Leah decided to stick with Legos and be WyldStyle from the Lego Movie.


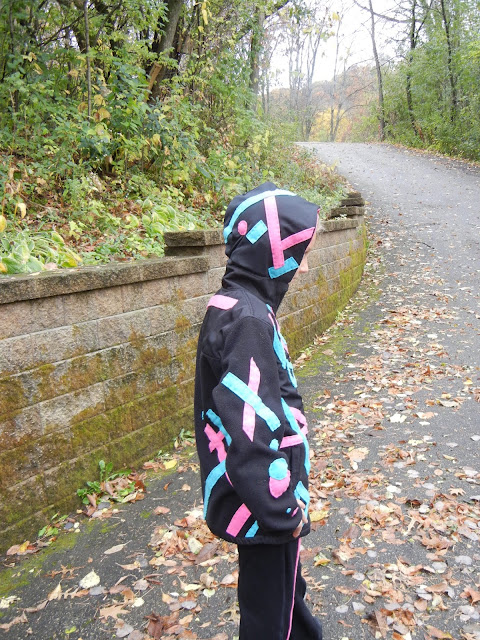
The costume itself was super easy.  We bought black pants and a black zip up fleece and embellished them with fleece strips.  Leah designed the graffiti strips herself trying hard to make it exactly match the Lego minifigure.  There are a bunch on the front, a few on the back, then the sleeve, and the hood.


I hand stitched the strips on with matching thread and a big running stitch.  Some of the places (sleeve, etc) were too fiddly to try and fit under the machine and this way the strips will be easily removable later.   I won't lie - it took a good three or four hours to get them all stitched on.


The black sweatshirt we purchased didn't have a hood but Leah had previously crafted a black hood with a pink lining so we just popped that onto this sweatshirt.  


She made a cardboard 'relic detector' so she can pretend to the looking for the 'Piece of Resistance'.  :)


Overall a pretty simple costume and she loves it.  
But, come on, really - 
who wouldn't want to be a cool ninja Lego girl who saves the realm?!  


Halloween 2015 - Batgirl Costume

It's official - the princess years are over.  

We weren't doing the princess thing for Halloween last year either but in the last year any vestiges of princess play have disappeared entirely.  I'm not really sad - we were in that phase long enough.  This year it's all about Legos and DC Comic superheroes.

Introducing...  Bat-girl! 


This was a fun costume to make, mostly consisting of fleece accessories and embellishments on store bought clothes.   The base is a black long sleeve t-shirt and black leggings.  

The shirt got a fleece bat symbol.   I'm sure she'll wear the shirt to school on its own once Halloween is over, which is a nice bonus.  


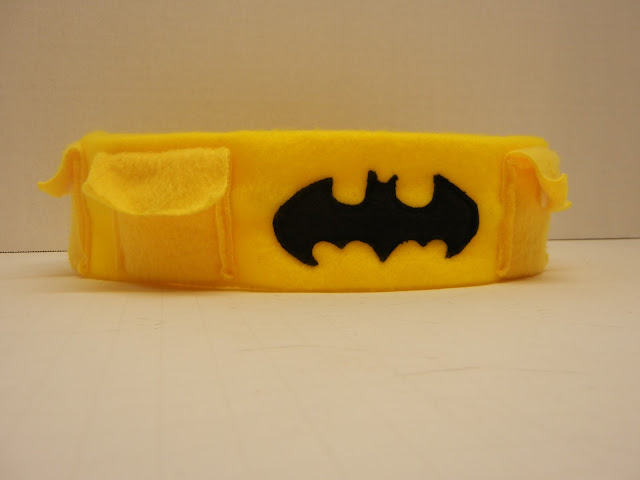
I made a utility belt from fleece.  It closes with velcro in the back and has a bat symbol at the center front with two utility pockets on each side.  The pocket flaps kept sticking up so they are held closed with a velcro dot.  Grace reports the pockets are the perfect size for carrying tissues and hiding pieces of candy.  :)  


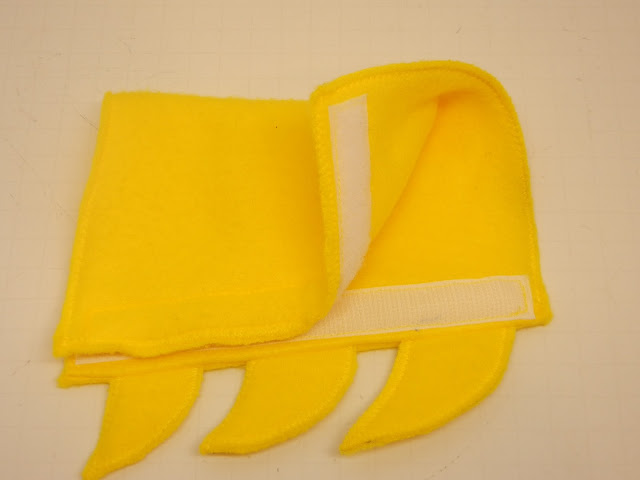
The arm cuffs were pretty fun to make.  They are fleece for the most part.  The claws have a layer of stiff interfacing in the middle to make them stand out straight.  The cuffs close with velcro and simply go over the shirt sleeve.  I made the velcro meet 'wrong sides together' rather than overlapping to help those cool flanges stick out from the arm.  


The leg cuffs/fake boots are yellow fleece tubes attached to her leggings.  I shaped the front into a point and attached the cuffs around the top of the yellow.  They hang loosely from that row of stitching - not attached at the ankle so that they can hang nice and cover the top of her shoes.  


The cape I had made over the summer (and apparently forgot to blog about) so that was ready to go.  


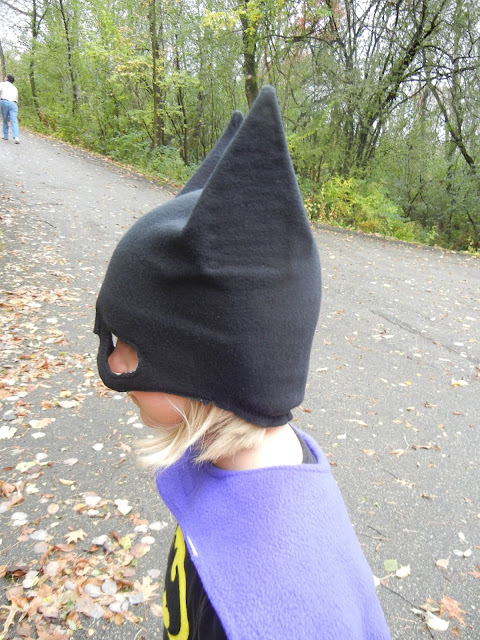
The helmet was tricky.  Grace specifically wanted a helmet rather than a mask.  I'm not thrilled with how it turned out but didn't want to spend forever and a day on it either since the other parts of the costume will likely get more wear.  I started with a tube shape that fit her head, tweaked the tube shape to make the bat ears (gluing in a piece of craft foam to make them stick up nicely), then fiddled around for far too long trying to get the eyes and nose to look decent.  I couldn't really get the part around the eyes/nose to fit tighter and closer to her face, but oh well.  Its all soft fleece so its comfortable and it gets the general 'Batman' theme across.   A bit of elastic holds it taut in the back.  We did a trick-or-treat activity yesterday in the windy cold weather and she wore the helmet for two hours straight both trick-or-treating and playing at the park so it must be comfortable enough and it kept her ears nice and warm.  


Here she goes... off to save the world - or at least second grade - from evil villains!  


Friday, October 16, 2015

Cloth Diapering Wet Bags

My last post was at the end of August - about seven weeks ago.  I have sewn SO much in the last seven weeks that it is definitely time to catch up and blog a few things.

Most of my sewing in September was at work in the costume shop.  I made a dress and eight pair of pants for the musical ''Oklahoma!''.  Fun - and a great part time job - but pants aren't really all that exciting to sew.  Especially when you finish sewing them and they are immediately spray painted and scuffed up so that they look old and worn and dirty on stage.  :(  I understand why its done, but its still painful to watch...

On top of the costume shop sewing, I'm working on a quilt and I made myself a dress and Grace a dress for a wedding last weekend.  I don't have pictures of those yet so those projects will have to wait.

So... I'll share the fun things I made this week!  We have a new baby second-cousin on the way in the late half of October and the mom-to-be asked me for a few things.  This is baby number four for them so I told her I'd make her anything she needed/wanted that would be helpful when you already have most of the baby essentials and you're way beyond the 'adorable but useless' phase of parenting.  :)  She wanted extra large receiving blankets and a few 'wet bags' for cloth diapering.  I said, "Yes ma'am, coming right up!"

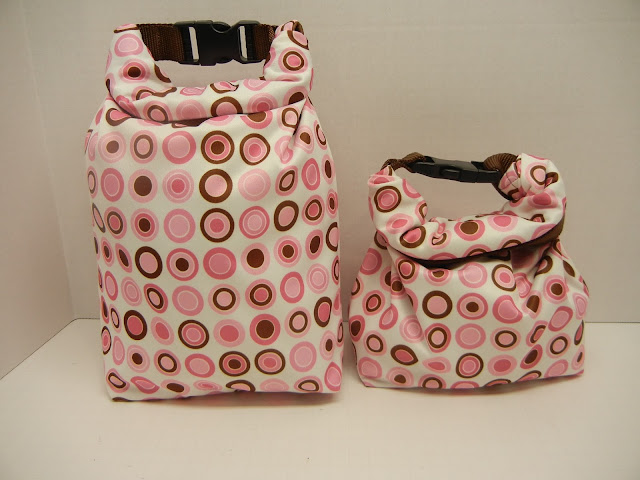
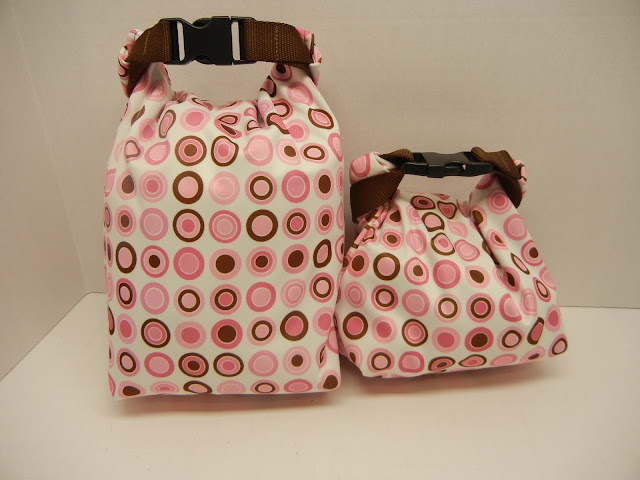
These are the wet bags.  Aren't they cute?  


I made one small and one large.  
One for pee diapers and one for major blowouts involving clothes. (Wink.)
I'm kidding, I just wasn't sure what size would be most useful so I made two.  

They are made of PUL, a funny fabric designed for cloth diapers that is a bit plasticky and waterproof.   The whole idea of a wet bag is that you put the wet/dirty diapers in it to keep them contained and keep them from leaking all over the rest of your diaper bag/car/stroller/etc.  The bags are self-lined in PUL so I'm hoping two layers will do a good job of containing the mess.  

You start with a pretty standard boxed tote shape - self lined, as I said. 
Then add the hardware to make the closure.  
I used this tutorial (scroll down within the book review post) from my favorite blogger for the general idea.  

Here is what they look like flat.  


To use it, you put your stink inside. 
(I took this picture just to show the lining, but it works for 'putting the stink inside' as well!)


Fold over the top of the bag. 


Fold it again. 


And again.  You're kind of rolling the bag down. 


Then put down your camera so you can use two hands to bring the clips together and close them. 


Ta da!  
Bag all sealed, held closed by the clips, which then also form a handy little handle to either carry it or attach it to something.  I could totally see clipping the stink-filled bag to the outside of your diaper bag/stroller/etc. rather than keeping it inside, couldn't you?!


I hope they work well - they sure are fun and reasonably quick to make!  

Happy Baby Number 4 You-Know-Who!