Welcome to Anne's sewing blog!

I started this blog in 2012 in an attempt to keep better track of all the little things I make. I have found it fun to 'catalog' what I make so I'll continue to post my finished projects as they appear.

Its mostly for my personal use, but also gives me a way to share cute stuff with my craft-oriented friends and family. Enjoy!

Tuesday, February 17, 2015

Fabric Bucket (for Diaper Supplies, in this case)

I love containers - baskets, bins, tote bags, hand bags, clear glass jars, rubbermaid buckets, etc.  You name it, I love it.  I think it comes from having a low tolerance for clutter around the house.  When stuff is laying around, it's clutter and drives me crazy.  Put that same pile of stuff in a basket and - whalah! - it's no longer clutter.  It's cute and contained and can wait for another day before it get sorted and put away.  For that reason I love to brainstorm containers - fabric buckets, totes, bins, crocheted baskets, or pretty scrapbook paper adorned boxes.   Pinterest has a never ending supply of inspiration that I could only dream of filling my house with.

Anyway, there was a baby shower to sew for recently and I've had visions of fabric buckets dancing around my head so a diaper-changing-station fabric bucket seemed like a good project to try.

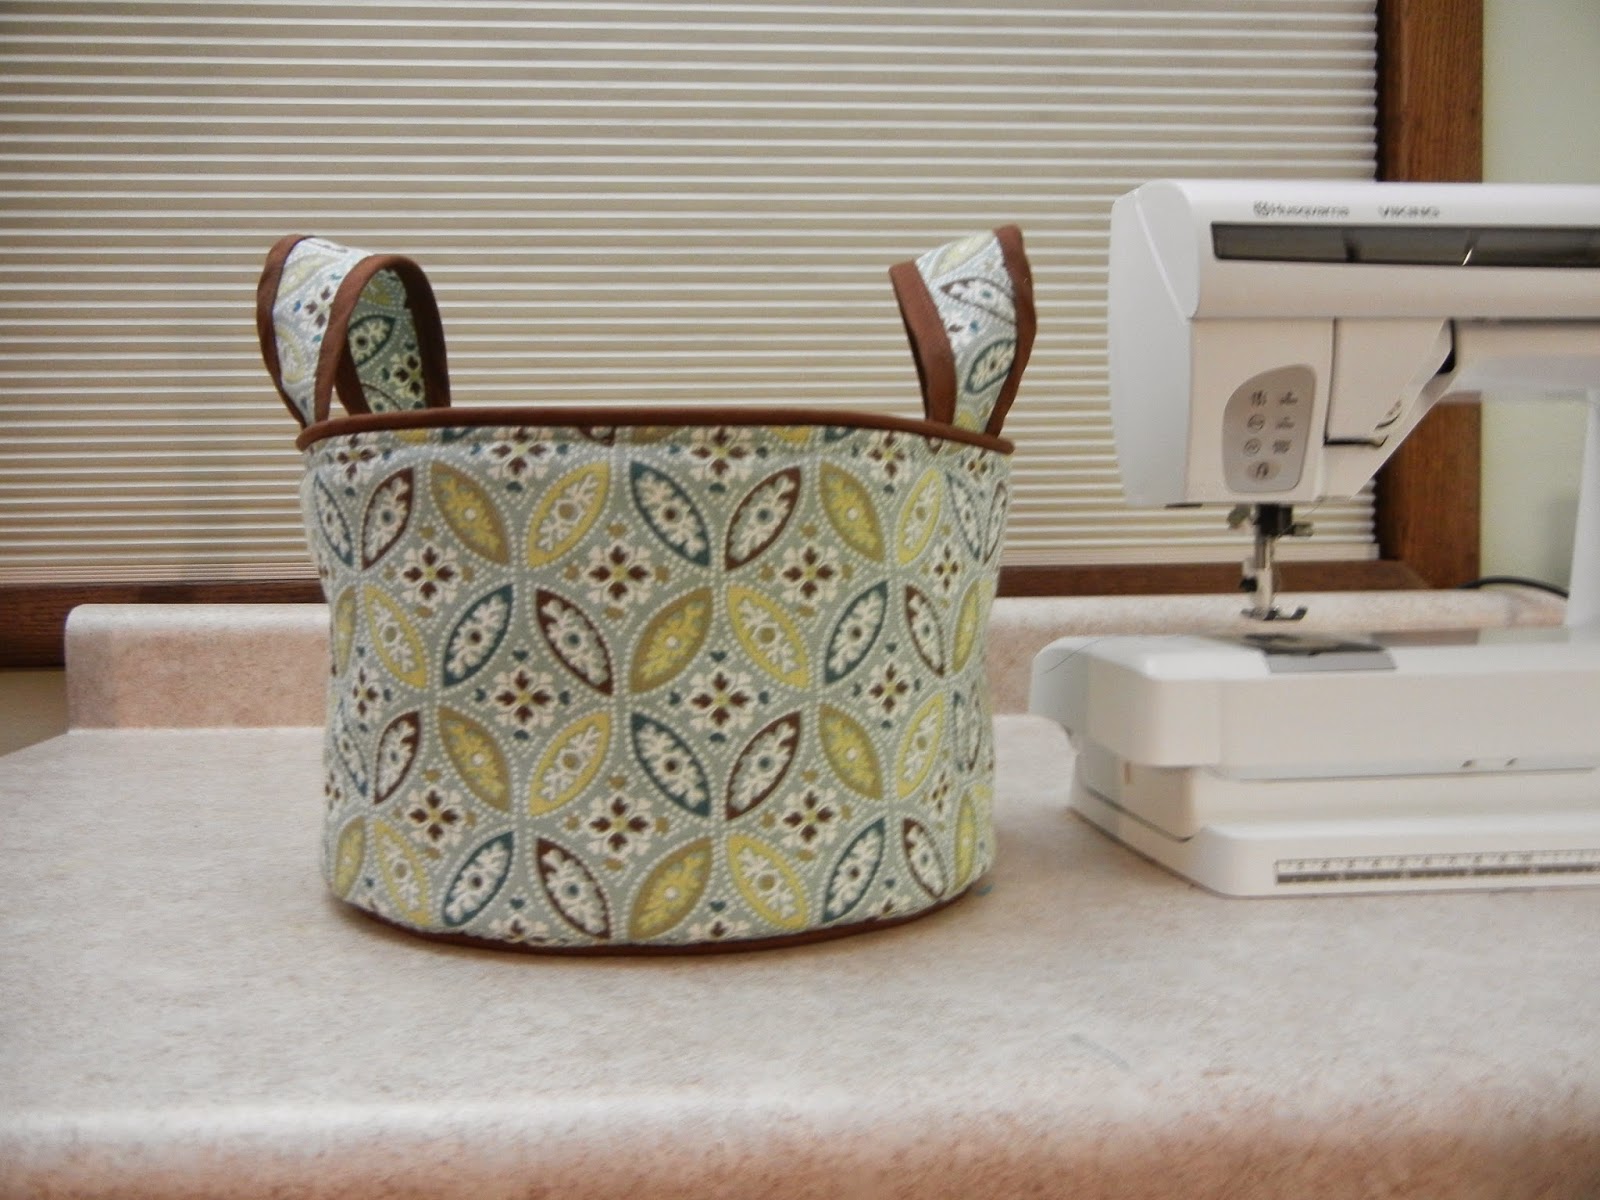
There was much trial and error in the making of this bucket... this is the end result.


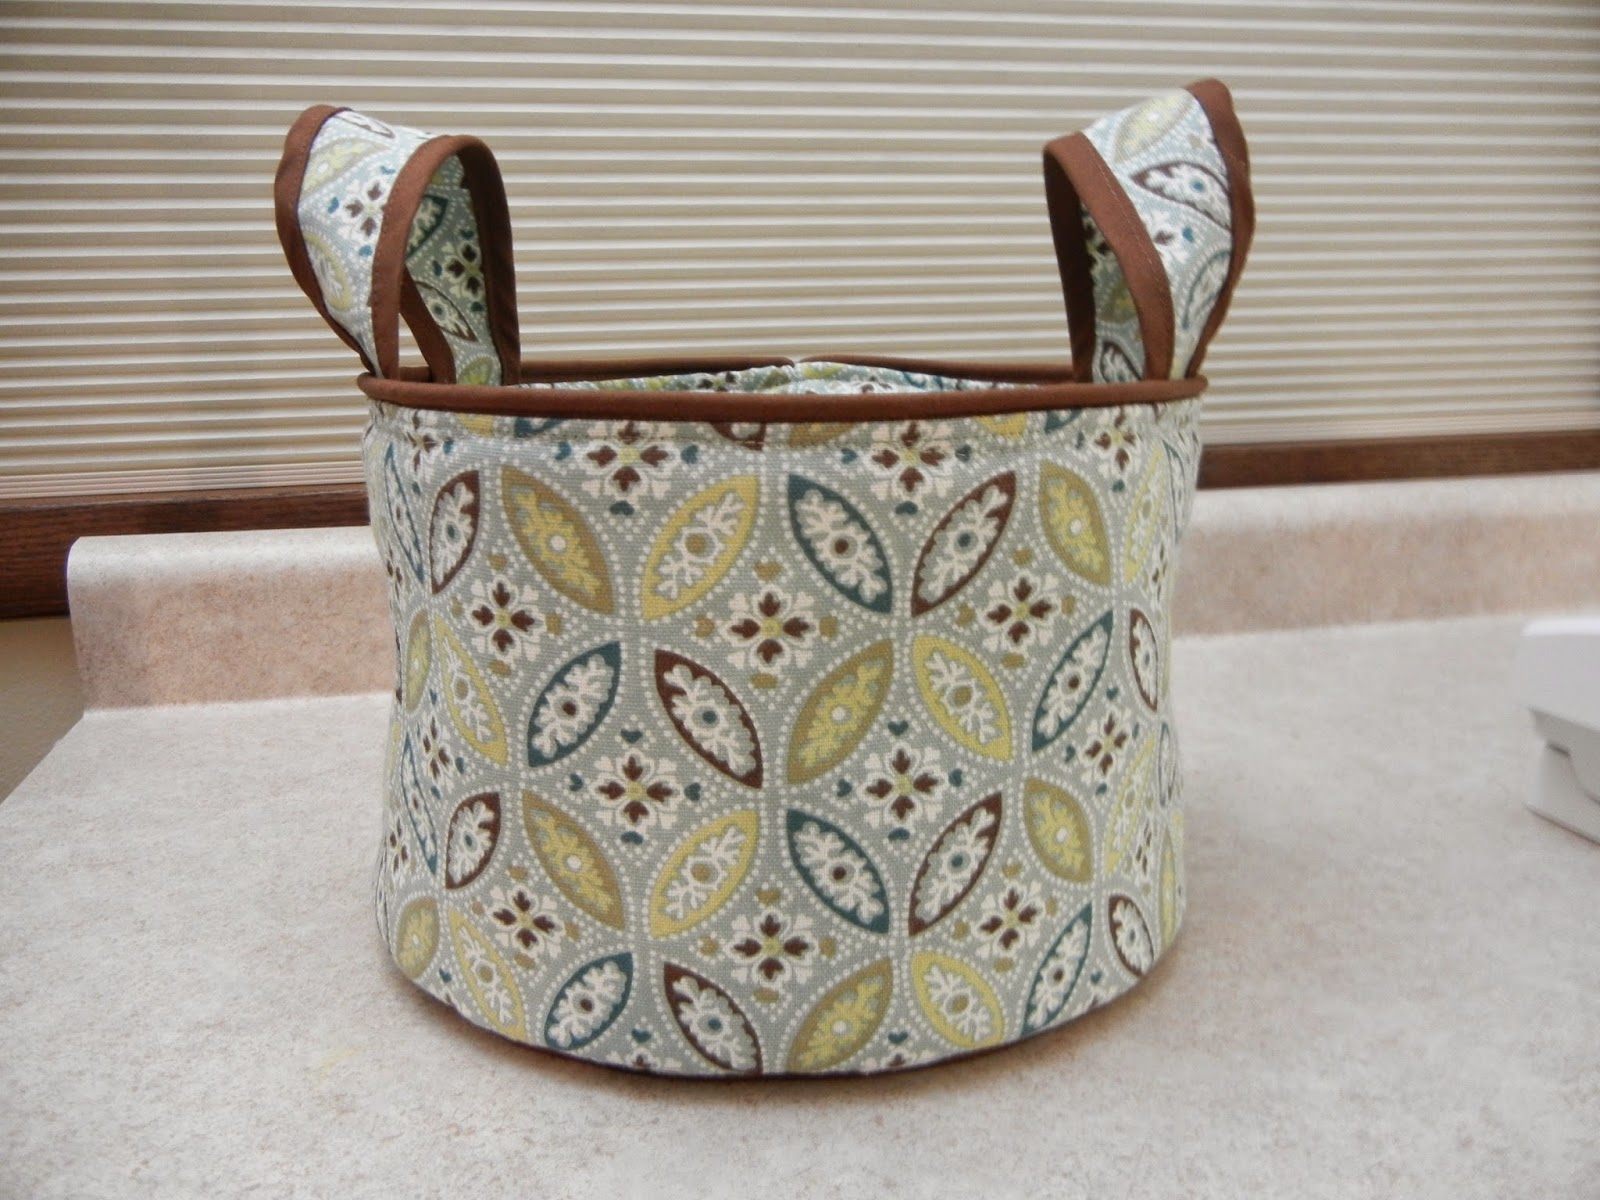
Its made from home-dec weight canvas from Hancock Fabrics.  The brown trim is quilting cotton and the piping is cotton-covered clothesline.  

The bottom is piped and has a circle of plastic canvas in it to keep it stiff.  


That stiffening is what gave me the most grief with this project.  I tried multiple variations and combinations of fabric, batting, plastic canvas inserts and interfacing to try and get just the right amount of stiffness in both the bottom and the sides.  I loved the plastic canvas in the bottom - I just couldn't get it to work for me in the sides.  It was too stiff, wouldn't stay in a nice circle, kept jabbing and poking in wrong places, and made the top piping lay all goofy.  In hindsight, the sides needed interfacing (probably both the outer layer and the lining) but by the time I figured that out it was all put together with the lining/piping/handles all attached and I wasn't about to pick out all that stitching to add interfacing.  Next time I guess.  As it is, the bottom is awesome and the sides are softer than I'd like, but it is still perfectly functional.  Once you fill it up its nice and sturdy.  

I'm addicted to piping in bags and totes - it gives such a nice crisp edge to things.  I really should have piped the handles too rather than bound them...  


Here is a photo by the sewing machine so you can see the size.  
If I recall correctly the diameter is about 10-11 inches.


Its lined with the same fabric.  I'd like the lining to be smoother and neater but after wrestling plastic canvas in and out of a lining hole multiple times it got all rumply.  


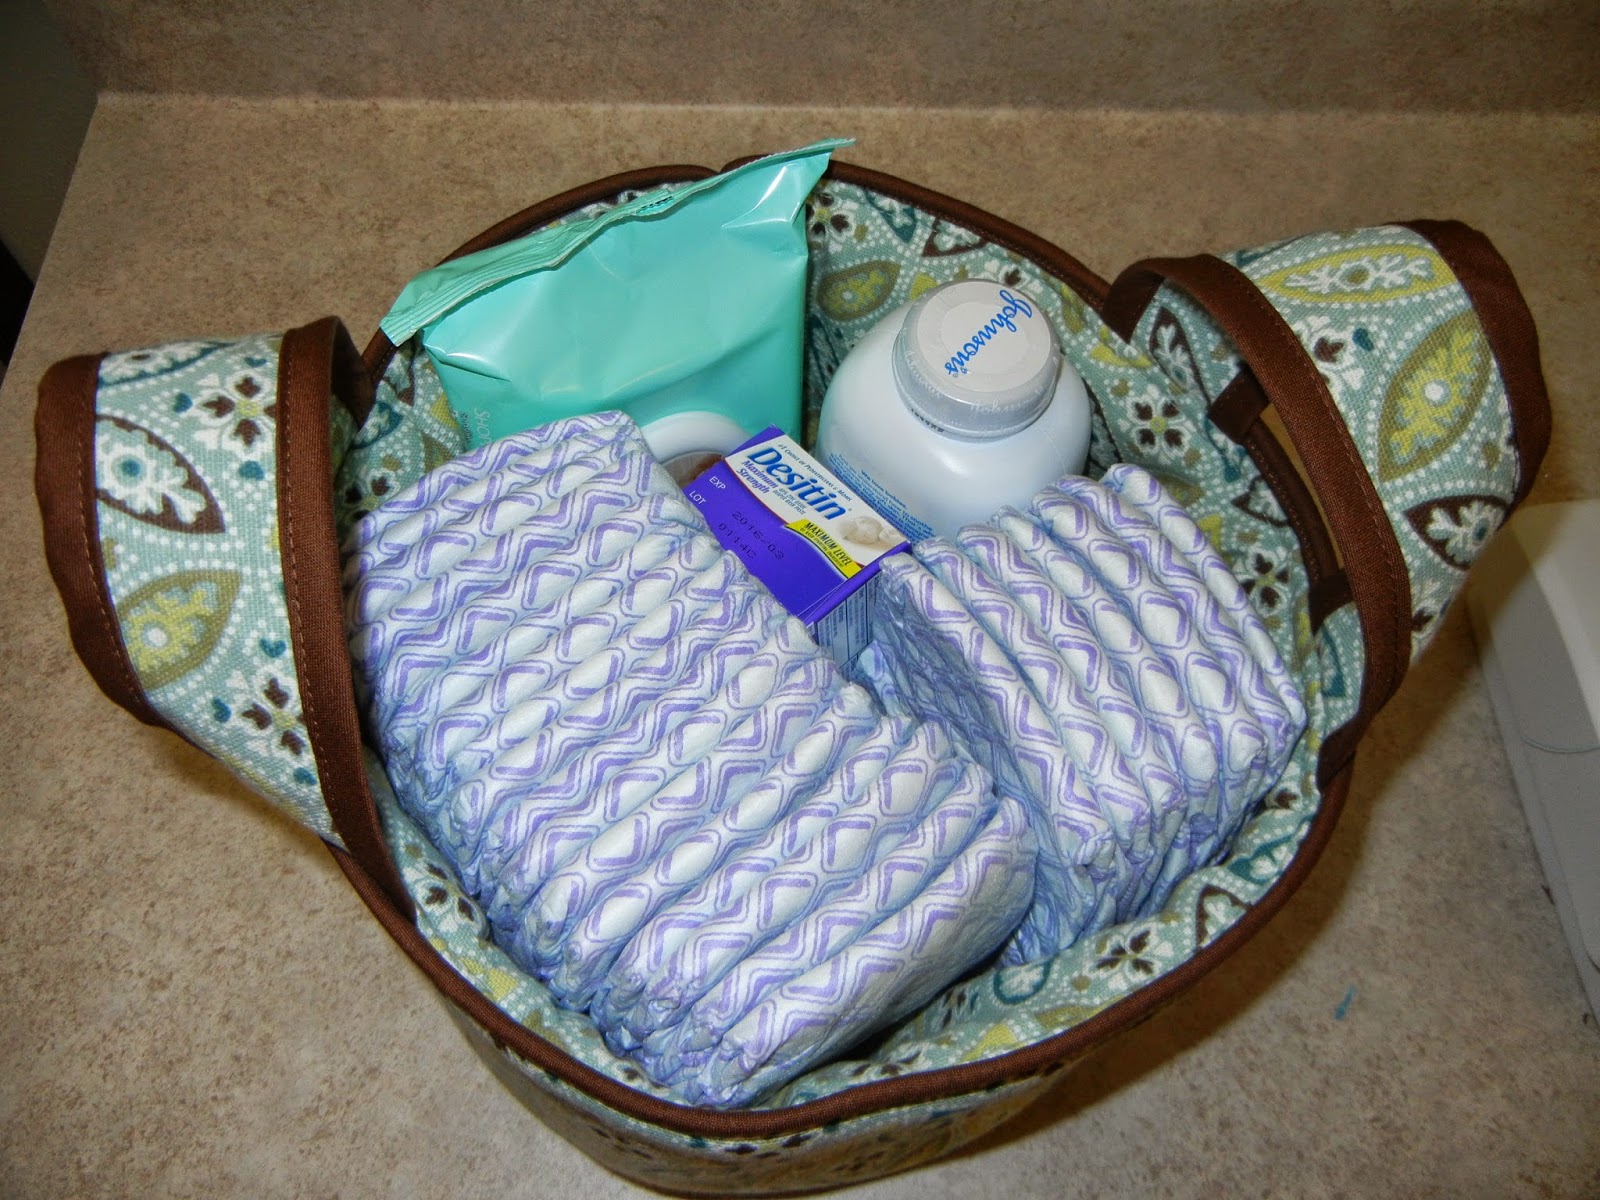
And... here it is all filled up and ready for diaper changes.  


This was a fun project and I learned a lot so I look forward to more fabric buckets in the future.  


Sunday, February 15, 2015

Crochet Hats

I was busy crocheting hats in January.  There was plenty of regular sewing going on in the costume shop during the day so it was nice to crochet at night or on the weekends.

I made two hats.  For myself, no less!

(Side note: How do you like my canning-jars-full-of-rice-hat-stands?  Trust me, they are much better than the goofy pictures I tried to take of myself in the bathroom mirror wearing the hats. )   :)


The purple and silver one was first.  This hat grew from the top down, then shrank as I pulled out rows to adjust things, then grew again, then shrank, then grew, etc.  My family laughed at me every time I'd go look at it (on my head) in the bathroom mirror, decide it wasn't quite right and rip it out again.  In the end, though, I ended up with a hat I really like and I learned a lot along the way.  It was a win-win.

The brim at the bottom is kind of fun - it curls up and makes it cute.  The only drawback is that it stretched pretty quickly with wear and so it's a little big.  I wear it on medium-cold days when I need a little something on my head but its not super cold.  I've also discovered its a good hat for when I'm wearing a ponytail in my hair - the hair lump fits nicely under the looseness of the hat.


After figuring out 'my size' with this particular yarn combo, I set out making hat number two.  I sized down one hook size to make it a little denser/tighter and also left out one row of increases so the hat ended up smaller.  It fits nice and snug and is good for windy or cold days.  


I did a different brim - basically a longer hat so that I can turn it up and my ears are covered by a double layer of crochet.  I did flip the right side/wrong side when I got to the brim so that when I flip it up it's all still 'right side showing'.  I love the repetitive look of crochet and wanted it all to match. 


I also did a better job of concealing the rows in the second hat - you can see the start/stop of the rows pretty glaringly in the purple hat but not so much in the pink one.  


I have a new silver/grey winter coat so these hats were made with one strand of silver yarn and one strand of colored yarn held together.  I have been wearing them both for over a month now and like them both!  I do enjoy the trial-and-error of learning to crochet.  Each of these hats only took a matter of days to complete so they were quick and fun and useful.