Welcome to Anne's sewing blog!

I started this blog in 2012 in an attempt to keep better track of all the little things I make. I have found it fun to 'catalog' what I make so I'll continue to post my finished projects as they appear.

Its mostly for my personal use, but also gives me a way to share cute stuff with my craft-oriented friends and family. Enjoy!

Thursday, September 26, 2013

Gaudy Scarves

Remember this scarf?

Well, the girls wanted their own and I let them pick out the yarn.

Someday they'll grow out of gaudy pink and purple, right?  :)


And, yes, I did three scarves for two girls.  
'Cause I know one will always be wet, dirty, left in a school locker, etc...

UPDATE:  I have since learned that you're suppose to block knitting things.  I wondered why the scarves were so twirly...

Monday, September 16, 2013

I Sewed A Shirt...

I made a shirt.  From scratch.  AND its even fit to be worn outside the house.  :)


The front is pretty classic, the back has two nice long curvy darts (which is why it fits so nice and why I wear the original so often).  


If you'd have told me six months or a year ago that I could make a button-down fitted shirt I'd have said you were crazy.  However, after months of reading pattern drafting books and experimenting with little things here and there I have apparently gained some useful skills.

I used a rub-off technique to copy one of my favorite purchased button down shirts that I wear all the time.  The rub-off results in a paper pattern which you can then use to make another shirt.  The rub-off part went pretty smoothly and then I laid out all my sewing books and slowly made one piece at a time.  This was my first time actually sewing a collar, collar stand, cuffs, plackets, and real buttonholes that have to work.  :)  I have to say that everything went very well and nothing was all that difficult - maybe I was more mentally intimidated than I needed to be.  I even managed to set in two very nice fitted sleeves.  Wa-hoo!

Collar:


Sleeve Cuff:  
The original shirt was long sleeved but I made this one elbow-length and added a curvy detail and decorative button to the cuff.  


It didn't go absolutely perfectly - the buttonholes are a tad off center in their placket and the bottom hem is a tad curvier than the original due to a mistaken adjustment in the draft - but overall I am extremely pleased with it.  My first attempt at sewing 'real' clothes was a comedy of errors during the construction process so I was very happy when the construction of this shirt went so smoothly and I didn't need the seam ripper every other minute.  Since I wear the original shirt all the time this should be a handy addition to my closet.

Post Edited:  Can you find my error?  I found one after wearing it a few times.  Ladies shirts are supposed to button the other way around...right over left, not left over right.  Interestingly enough, the original shirt is also buttoned as a mans shirt (which explains why I didn't catch the error while sewing).  So, my favorite shirts from Ralph Lauren are either buttoned up wrong or they are actually a men's shirt.  I've had them for eons and I don't usually buy Ralph Lauren so I'm guessing they were a purchase at the Polo Outlet Store from a trip right after we were married.  I think the Outlet Store sells one-offs and rejects, so that would explain why the button placket is backwards.  Funny the things you discover later on....   Anyhow, I've learned my lesson to pay closer attention to button plackets and I don't think anyone but a seamstress would notice when I'm wearing it out and about!  :)

Next up will likely be a quilt project...

What?! Crochet?

The girls and I got bitten by a crochet bug a few weeks ago.  The girls stumbled upon my inherited crochet hooks in a drawer and asked what they were for.  I told them it was similar to knitting, found a video tutorial on the internet, and showed them how to do the starting chain stitch.  I figured the interest would last about ten minutes.  Boy, was I wrong!  Both girls got the hang of the chain stitch quickly, and were SO enthralled with how they could make a long chain in a matter of minutes that it became an obsession.  They each rummaged around and found a basket to hold their hooks and yarn.  I'd find them around the house, sitting on the couch or curled up in corners with their workbaskets, making looooooooong chains.  First everyone in the family got necklaces, then they moved on to their stuffed animals, and then they just made chains for fun.  Scraps of yarn were everywhere...

I started teaching Leah the single crochet stitch after a day or two.  She found that quite difficult and thats about where her interest waned.  I, however, kept practicing the single crochet, got the hang of it quickly, and started messing about with swatches.  Before I knew it the stitches were pretty even and nice looking.  A few days later I had this lovely scarf to show for it.


I have found the repetitive motion of crochet to be slightly addicting.  Once my scarf was half-way made the girls gave me their puppy-eyed look and then came the inevitable, "Mommy, will you make one for me too?"  I have Leah's done and will be starting Grace's soon.

Who knows where this little jaunt into crochet will lead.  Its not like I don't have enough sewing to keep me busy!  Its been a fun diversion, though, and gives me something to do to keep my hands busy in the evening while watching Masterpiece Mystery.  Keith also likes it because his grandmother did lots of crochet so he likes seeing me sit there with a hook and yarn.

Wednesday, September 4, 2013

Tablet Computer Bag

I am happy to show off this latest project - its a bag for a friend's tablet computer.  She has a tablet (a tad bigger than an iPad) and nothing to carry it in.   After finding one she liked on Pinterest, she e-mailed me the picture and said, "Do you think you could make something like this?"

I spent a few evenings turning the idea over in my head figuring out (1) what pieces I'd need and (2) what order they should be sewn together.  A little fun shopping for upholstery fabric and other cool things like straps and piping and I was ready to begin.  It came together really smoothly and turned out almost exactly like the picture in my head.  Yeah!  She loves it and is now toting it around campus.

Here is the finished bag, in a couple of different views.

This is the front:  


The fabric is a neat corduroy-type tan with a fun circle pattern.  The straps are purchased webbing.

The back:  


And a close-up of the cool piping.    


The front has a slot pocket the width of the bag with a wide piece of velcro for a closure.  
I had wanted to do a flap to close the pocket but all the layers of canvas and upholstery fabric and piping got to be a bit too thick so it ended up being a slot pocket.  


It closes with a zipper that goes around the corners of the bag for easy opening.  


The inside is a nice soft fleece fabric to protect the computer.   I quilted the fleece to canvas to keep things nice and sturdy and give the bag some stiffness.  


The trickiest part of the bag was deciding how to attach the outside to the lining.  There are many layers between canvas, fleece, piping, upholstery fabric and the zipper so I ended up putting bias binding around the edges of the lining and then hand tacking that to the outer portion of the bag.  It worked great.  Both the inside and the outside are properly finished (no exposed seams) and everything stayed nice and tidy (even around the zipper ends).  


Here are a few pictures with our MacBook Air (11''?) for size reference.  My friends tablet is a bit smaller than the MacBook so there will be plenty of room for a book or two or an accessory keyboard if she needs to carry one of those.  


It was fun to make and very satisfying to make from scratch.  Sometimes when you sketch an idea and try to sew it things get crazy and don't turn out, so it was great to be able to visualize it and then sew it up and have it turn out so well.  


Thursday, August 29, 2013

New Pillows for the Couch

Whew - after a hiatus in July for travel and illness there has been lots of sewing going on the last few weeks.  Time to catch up and post the finished projects.

First up is a few pillows.  We have some throw pillows on our couch that have been thrown a few too many times and are all floppy and lumpy.  I've been meaning to replace them for a while now and new pillows seemed like a great project a few weeks ago when I was recovering from a nasty stomach bug and needed a quick, easy, instant-gratification type of project.

I made two 18'' quilt blocks from a coordinating set of fabrics I picked up over a year ago (with these pillows in mind, no less, because they match our living room color scheme).


One is a star pattern.  I've been wanting to try this star block for a few years.  It came together nicely, but I won't be doing a whole quilt of these blocks.  One star block has 24 pieces, half of them are the reverse of the other half, and they are all odd shaped triangles.  Translation: very easy to get the pieces confused.  I had a hard enough time keeping things straight for one block - I can't imagine doing a whole quilt made of this block.  Also, since the pillow form is puffy and rounded, when you look at the pillow from afar you can't really see any of the oh-so-carefully matched star points on the edges.  If I do it again, I'll make the star smaller and put a border around it so that you can see all the star points at first glance and the border will be the part that gets 'rounded off' on the curvy pillow.  Who knows, maybe it'll get better as the pillow gets used and flattened out?  I quilted it by machine and outlined the interior of each triangle shape.  It involved lots of corner-turning but I wanted to accentuate the triangle/star pattern rather than run over all the seams and have a mish-mosh of seams in each corner.


The other pillow is a simpler pattern - just a series of squares - and I really like how it turned out.  I am too anal/organized/OCD to do a random scrappy look so I had to at least put them in diagonal rows by color.  For me its a good mix of organized and scrappy.  I quilted this one a bit inside each seam and I like how the stitching ties it all together.


Here are the new pillows 'in situ':  


They were a fun, quick project and now I can cross 'new couch pillows' off the 2013 To Sew List!  


Monday, August 5, 2013

Moms Swimdress for 2013

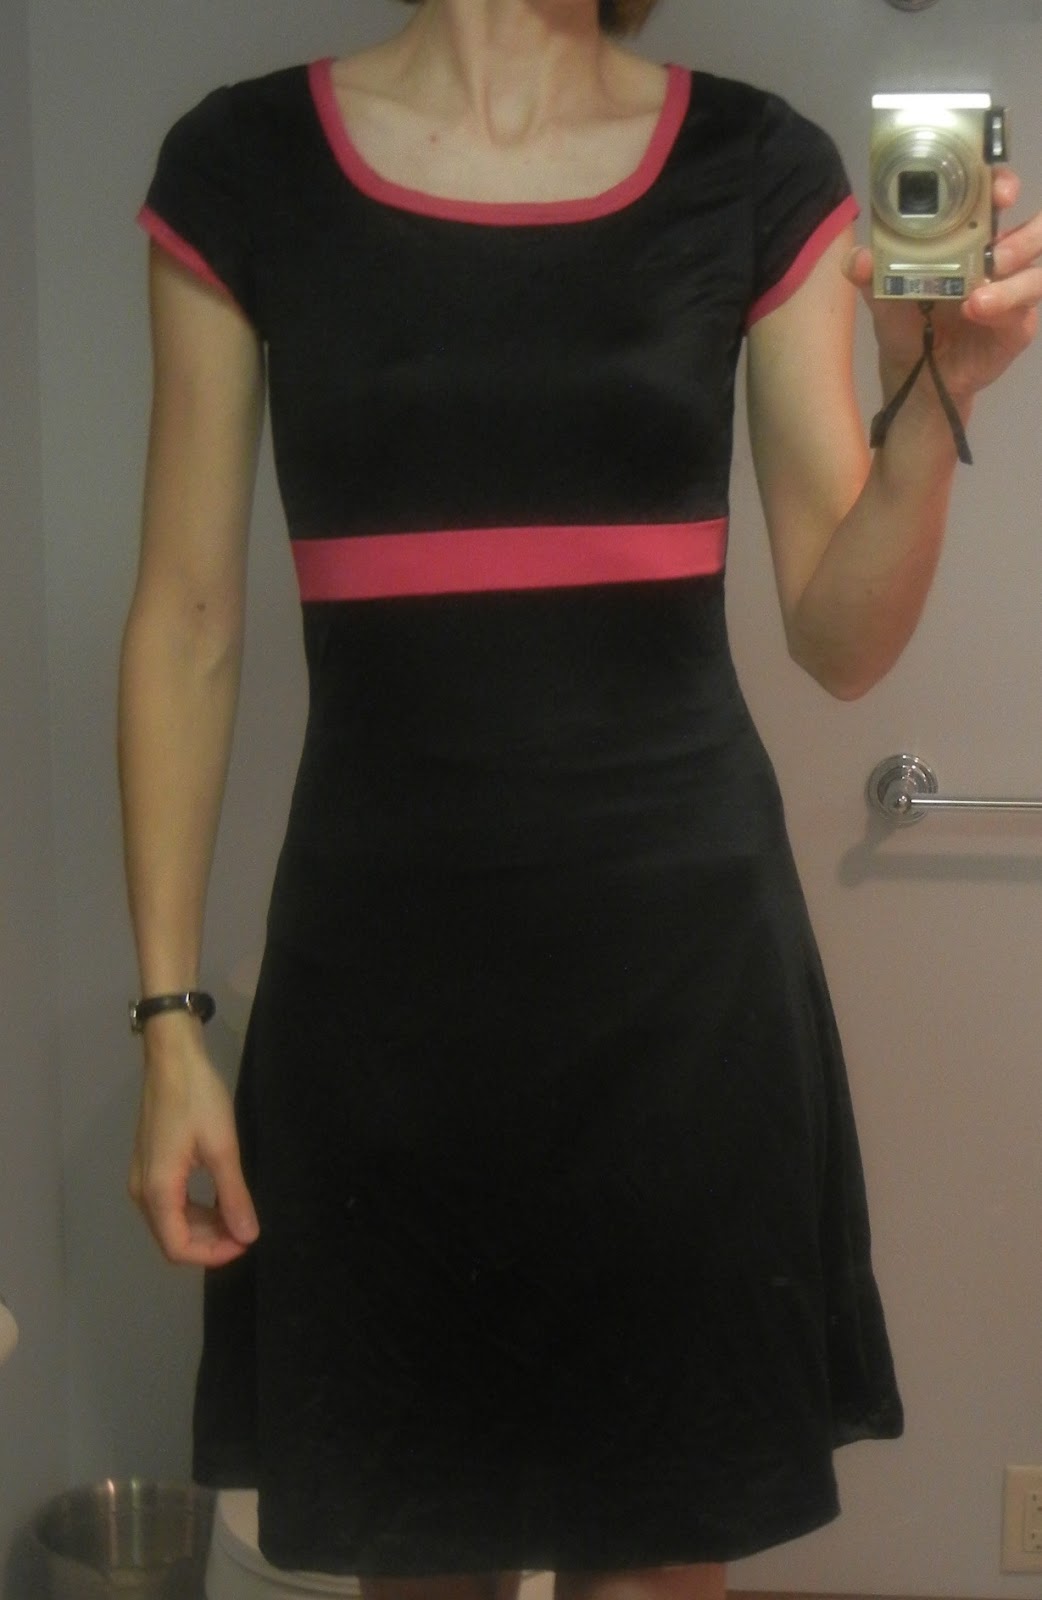
I get a new swimdress this year too.  I am very happy with how last year's suit has worked out.  Great coverage and decent fit.  This one is purely an excuse to mess around with pattern drafting and make myself something new.  I wanted to try the color-blocking (that's the pink line under the bust), wanted to try a different shaped neckline, and wanted to practice the double-needle topstitching around the neckline.  I've already worn it to the pool once and its great.  I'm not completely sold on the solid black material - maybe a small print would be better.  My inspiration came from some suits I pinned here.

I discovered its very difficult to get a decent picture of shiny black material.  These are the best I could do for now.  You'll have to excuse the wrinkly skirt - its been in a drawer for a while as I made it over a month ago and am just now getting around to taking photos of it.


Kids Modest Swimwear for 2013

I've continued to make swimsuits for my girls.  Now that I've got my own working pattern(s) and have a little practice sewing on super-stretchy lycra they are pretty quick to work up.

Leah requested a bodysuit style this year - so she could look like Rebecca Soni and all the other Olympic swimmers.  Cute, huh?   I took her sloper and drafted a shirt.  I used a rub-off technique found in this book to copy the armholes and sleeves from a leotard we have that happens to fit well.  It worked pretty well - I found the rub-off fast and easy to do and the resulting armhole and sleeve on the suit work great.  The lycra is pretty forgiving so I don't know how it may or may not transfer to a regular set-in sleeve but its good for this application.  The leggings pattern I had already and is one of my standbys.  Its good for swimsuit shorts and I've used it for full length leggings/tights for school as well.

Here is Leah's Olympic bodysuit.  Convincing her to stop dancing long enough to take the photo was an issue so it looks a bit twisted and uneven - its really not.  :) (Also, the matching of her suit and her crocs was a happy accident.)


I ended up needing to add a band to the bottom of her shirt.  
It was too short otherwise.  If I make another one I'll make the shirt longer.  


"Can I make a diving pose Mom?"


Grace's suit this year was a piece of cake because I could use the exact same pattern I made for Leah two years ago.  That is a handy bonus now that I've been making suits for three years - I can start reusing things. Her suit is the swimdress pattern I made up, with lengthened sleeves.  


"Mommy can I do a pose too?"  


I was pleased with how this neckline turned out.  
Better yet, I wrote down how I did it so I can repeat the process later.  


The sleeve hem and bottom of the dress hem are simple turn-under-and-multi-step-zig-zag.


Here are the little shorts that go underneath.  They are completely separate from the dress.  


Swimming lessons, here we come!